Hi and welcome to Day 4 of our Black and White Magic online class.
A very interesting array of images being posted – so GREAT work!!! If you are having trouble getting into the Facebook group you will need to send me a friend’s request so that I can add you to the group!!
Today’s post processing tutorial will look at using the Adobe Camera Raw interface for converting an image to Black and White.
Here we will be doing Basic image editing and then using the HSL/Greyscale functions to create our black and white image.
You can use the similar interface in Lightroom’s Develop module if that is your workspace of preference.
You can download your PDF and work files HERE
.png)
Tech Talk
Today we are going to be discussing Depth of Field.
Depth Of Field (A.K.A. DOF). Depth Of Field is not a real control, but more of a result of how you used the Aperture control on your camera.
Simply put, depth of field is the term used to describe what is inside the focused area of your image and what is left outside of the focused area.
The control that has the most impact on depth of field is aperture. Bigger apertures tend to provide shallower depth of field. That means that if you open a wide aperture (say f/1.8) you will have a narrow location in your image which is focused. If you set your aperture to a small value, say f/22, you will have a huge focused area.
Depth Of Field and camera to object distance – The second control you can employ to control depth of field is the distance between the camera and the object you are shooting. The greater this distance is the more depth of field you will have.
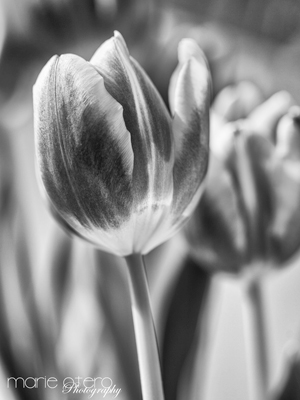
This image was shot at f2.8,1/250th sec, iso 100.
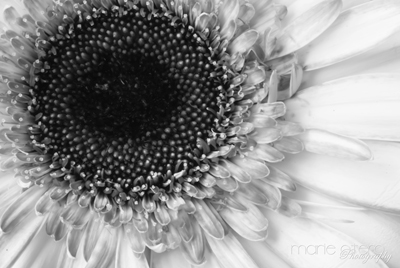
Depth Of Field and macro – Basically, there are two approaches for taking a macro shot – use very small aperture say f/16 to f/22 and get sharpness all across the image, or use a small aperture and get an artistic effect say f2/8 to f/5.6.
This image was shot at f32, 5secs, iso 100.

Depth Of Field and landscape – for shooting landscape, photographers often use a small aperture to gain a greater depth of field. This often necessitates that you use a longer shutter speed and support your camera with a tripod. This image was shot at f/11, 1/3oth sec, iso 100 with tripod.

Shallow Depth Of Field and portraits – You can take portraits with any depth of field you desire. Usually the most important rule is to keep both eyes within the depth of field and have them be the focal point.
This image shot at f8, 1/125th sec (flash), iso 100.
.png)
Shooting Assignment #4
Today have a go at experimenting with your depth of field. Try shooting some shallow depth of field, artsy flowers for example with your aperture wide open f2.8 or as low as your lens will let you go.
Change your aperture to something smaller and see if you can increase your depth of field. Remember- to keep your correct exposure you will have to slow your shutter speed down as you make your aperture smaller!
Take two pictures of the same thing, deliberately changing your aperture dramatically so that you can see the difference!
Have fun with it!!