Hi and welcome to Day 6 of our Black and White Magic online class.
There will be two post processing tutorials today.
The first method is using the Channel Mixer in Photoshop. Unfortunately this method is not exactly replicable in Photoshop Elements. The closest you get to it is the Enhance>Convert to BW which was in Day 5 for Elements users.
The second post processing tutorial covers Gradient Mapping which works just the same for Photoshop and Elements users alike.
The Channel Mixer gives you some great opportunities for creating fabulously dramatic Black and White images.
The Gradient Mapping technique is super for creating toned Black and White images and like the Greyscale conversion technique of Week 1 is really good for evenly toned images.
Today’s Project Files and PDF can be downloaded HERE.
CHANNEL MIXER – PHOTOSHOP
GRADIENT MAPPING – PHOTOSHOP ELEMENTS.
.png) TECH TALK
TECH TALK
The Magic Triangle….
One of the basic rules of photography is known as “the rule of reciprocity” or in “regular language” the exposure triangle and we have been working our way through this triangle over the last few days.
By now you already know that there are three controls that you have over when setting a picture’s exposure. (Three… as the number of angles in a triangle…). Aperture, Shutter Speed and ISO.
WE have looked at changing Aperture to control our Depth of Field and Shutter Speed to control movement and stop motion.
So what does ISO do? ISO controls the impact that light will have on the sensor of your camera.. A High ISO eg. 800+ means the camera will BE more light sensitive, while a low ISO eg. 100 the camera sensor is less light sensitive. In the days of Film camera photography, the ISO was controlled by the film specification, how light sensitive it was. Today this is controlled by the camera’s digital controls and can be set either automatically or manually.
By altering the camera’s ISO settings we can prolong or shorten the duration the shutter is open.
If you want to get more Depth of field (use smaller aperture) you can prolong you exposure or increase your ISO setting. Similarly, if you want to get a longer exposure, you can either stop down your aperture or decrease your ISO setting.
ISO setting usually double as you change each dial up. So opening one stop (say from f/11 to f/8) means setting one ISO lower (say from 400 to 200). Similarly shortening the shutter speed in one step (say from 1/125 to 1/250) means setting one ISO rating up (say from 100 to 200).
Sound complicated? Not really. Think of the Magic Triangle, you change one variable you have to move another in order to balance your exposure.
ISO and GRAIN.
The optimal setting for ISO on most Digital SLR’s is ISO 100 and the price that we pay for increased sensitivity is noise. The higher you go with your ISO setting the more noise your image will have.
ISO and softness – When taking pictures with a high ISO setting, the granularity of the image increases and even when in focus objects become soft. Objects that are outside the depth of field are even softer. This effect can be use to artistic means, and is very popular with black and white photographers.- YAY thats US!!!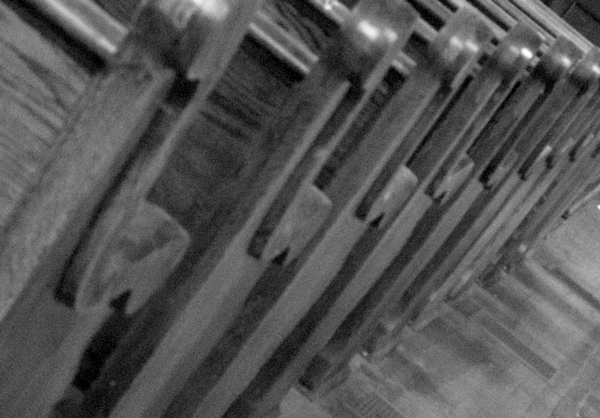 Example #1
Image viewed at 100%, shot at f8.0, 1/125sec, ISO 2000
The high ISO setting of 2000 increases at LOT of noise in this image and even though it appears in focus when zoomed out, it has become quite “soft”.
ISO and sharpness – this one is easy to remember – the lower the ISO the sharper the image.
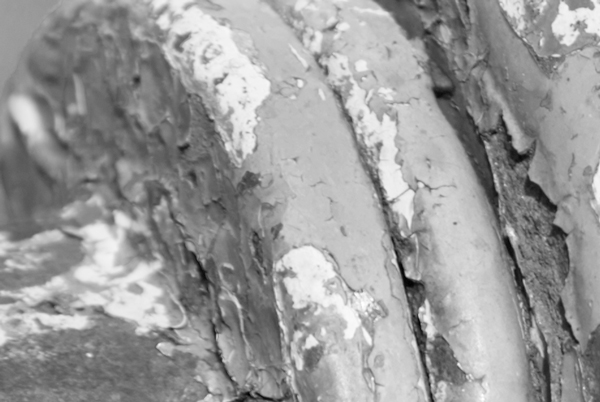 Example #2
Image viewed at 100% shot at f8.0, 1/100sec, ISO 100
The low ISO setting in this image results in almost no visible noise. Even zoomed in at 100% elements in the image are still tack sharp.
.png)
SHOOTING ASSIGNMENT # 5
To enable you to truly appreciate what the ISO setting on your camera does I want you to grab something at home, hairbrush, cup of tea, whatever.
Place your chosen object somewhere light and bright. Set your ISO to 100 then set the shutter and f-stop so that you get a good exposure.
THEN…..
Place your chosen object in a low light situation. Do not change your shutter or f-stop settings but change the ISO until you have it high enough to get a good exposure.
Then in Post Processing I want you to zoom up to 100% and look at the noise in each image and post a snippet of your High and Low ISO images.
That’s all for today…… have fun!